Showing posts with label Toddler. Show all posts

Tuesday, May 3, 2011

Playing in the Sandbox!

After severe frustration that a giant turtle was camping out in my living room because he was scared of the storms, I finally kicked Mr. Turtle out of the apartment yesterday and moved him out to his permanent home in the backyard. 


I even filled his belly up with sand and tiny baby turtles. 


And today hubby and I took little miss Buggy out to play! 


She went straight for her turtle. She had not been as excited as I was after his sudden disappearance during her nap yesterday. 


She had a blast :) 


In other news ... I took some photos of our eggs and threw them away :) 


They are so pretty. And we had a blast dying them with Lynney Bug. 


Photobucket

Click To Vote For Us @ the Top Baby Blogs Directory! The most popular baby blogs

Monday, May 2, 2011

Big Girl Bed !

I bought Ashlynn a Toddler Bed a few days ago at Once Upon a Child. 

It is a resale shop around the St. Louis area for baby, toddler, child, and maternity stuff. They have clothes, toys, and even beds :) 

So, When I was there Friday I sent my hubby this picture of this wooden toddler bed that they were selling for $35. 


He told me to go ahead and buy it. We hadn't been planning on getting her a toddler bed for awhile, but it was a pretty good deal that we couldn't pass on.  So, we scooped it up. My brother went with my Sunday to pick it up and bring it home. 

It has a few scuffs but my Father In Law is going to show us how to sand and stain it ... which I have never done before, so that will be an experience ! 

It had been my intention to break it down and put it away in the closet for six months until Ashlynn turns two, but she was trying to climb onto the frame and figure out what it was, so I pulled her mattress out from her crib and set it up in her toddler bed and she climbed up and down and all around it until daddy came from work. 

Because she seemed so excited about it, last night we decided to see how it would go if we put her in it for bed. She has always been a baby that does not like to be in her crib or sleeping at all, so we read her a book and kissed her goodnight and tucked her. After we left the room she got out of bed and came over to the door to yell at us for a minute, realized we weren't coming to get her, and then headed back to bed. 

So last night she wasn't too horrible. 

Her nap today was a little rougher. I think because the room was brighter so she could see all of the fun things that she could play with if she climbed out of bed. I had to put her back to bed three times and the third time i laid down next to her until she fell asleep ... 

So ... 

We will see ! 

My hubby is at work now and we talked about the naptime experience but haven't made the decision yet. Her crib is still set up right next to her new bed, so I'll let you know what we end up doing with the new bed. It may still be heading into the closet for a few months. 

 Either way it is adorable when she is sleeping in her big girl bed :) 


Photobucket

Click To Vote For Us @ the Top Baby Blogs Directory! The most popular baby blogs

Saturday, April 23, 2011

Daddy and Baby

I realize that Ashlynn is not really a "Baby" anymore, but to me she will always be my baby. 

It's hard to remember that on days like this one though.

Here is her Daddy teaching her to play some ball. 


She looks ready to knock one out of the park ... or at least my dad's front yard ! 

(And she's carrying the random paper because that is what she does. She finds something random that catches her fancy and you can't get it away from her for hours sometimes.)

Linking up here for Saturday Snapshot ...
yellow songbird


Photobucket

Click To Vote For Us @ the Top Baby Blogs Directory! The most popular baby blogs

Sunday, April 3, 2011

Rag Tag Blankie

My cousin had a baby boy this past Thursday night and I wanted to make her something cute for her new little buddy, so I put together this Rag Tag Blankie. 


 This is the beginning of the process. I've just used leftover squares from my rag quilts. the squares are 6" x 6". I think you could do 8" squares and make a little bigger, but still nice sized blankie. 


Match the front and back squares together, pinning them in the center.
 

You can see here both sides of the squares. 


These are the ribbons I used for this blanket, just some leftover ribbon from bows and other projects.  


Put two squares, lined up one on top of the other. Make sure that the two squares you want to be on the top of the blanket next to each other are on the top and bottom of this stack. 


Sew a 1/2 inch hem. And then do the same for the bottom two squares. 


After you have these two "rows", stack them together and sew a 1/2 inch hem. 


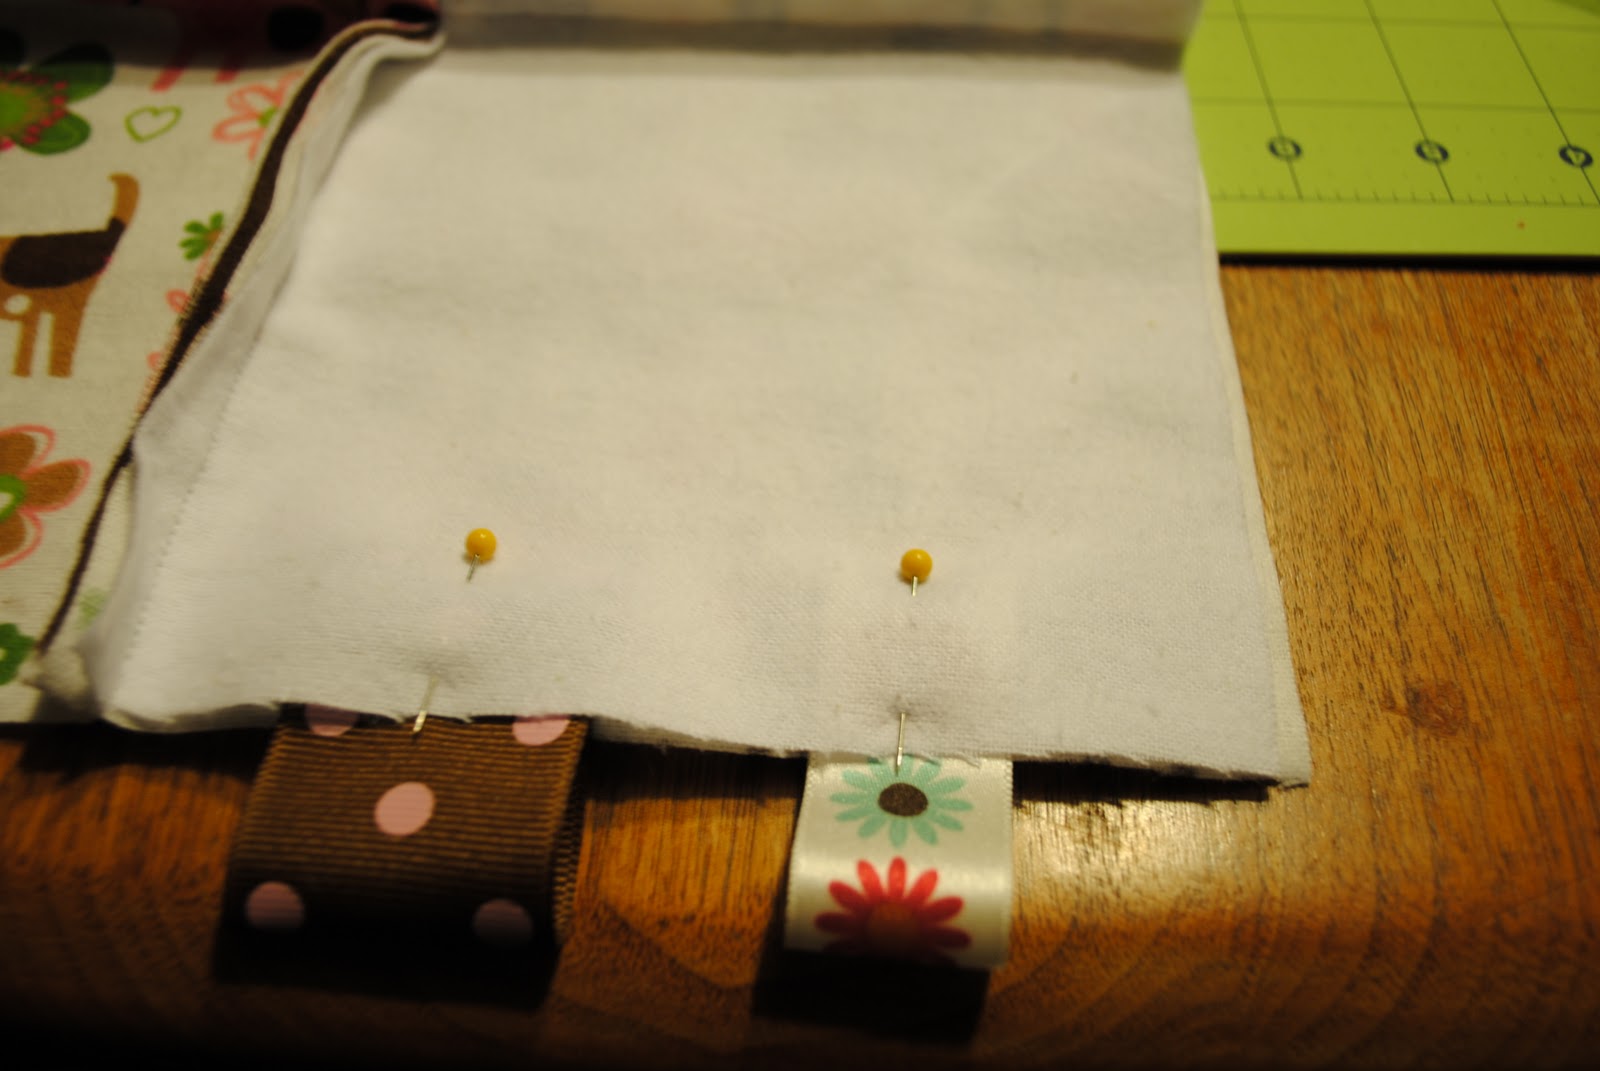
Do not sew the outside hem at this point. left up each square, fold a piece of ribbon in half, and pin it between the two pieces of fabric. Make sure that more than 1/2 in of the ribbon is inside the square, otherwise your hem will not hold it in place. 


Continue to place the ribbons around the square. I used four ribbons on each side, but you can use as many as you want. Use different sizes, colors, and textures.


The front should look like this with all the hems facing up. 


This is what the bottom should look like. None of your hems should be sticking up on this side. 


Sew a 1/2 in hem. 


Pull out your pins. As you take out each pin, give the ribbon a tug to make sure it is secure and isn't going anywhere. To make them more secure you can go around the square again to make two hems. You do not want to go less than 1/2 in though ! This will make ragging the blanket too difficult. 


These are my rag quilt snips. I got mine at Jo Anne's. You can find them at any craft store. They make ragging your blanket easier, but you can use fabric scissors. 
Take a coupon ! They are about 20$.


Take the snips are cut around the edge of the blanket and the inner hems. 


When you get to ribbons snip each layer separately over and under the ribbon.


When it's done throw it in the washer and dryer and it will rag to look like this: 


I am linking up at these amazing parties ! You should too ! 

Photobucket

Click To Vote For Us @ the Top Baby Blogs Directory! The most popular baby blogs