My cousin had a baby boy this past Thursday night and I wanted to make her something cute for her new little buddy, so I put together this Rag Tag Blankie.

This is the beginning of the process. I've just used leftover squares from my rag quilts. the squares are 6" x 6". I think you could do 8" squares and make a little bigger, but still nice sized blankie.

Match the front and back squares together, pinning them in the center.

You can see here both sides of the squares.

These are the ribbons I used for this blanket, just some leftover ribbon from bows and other projects.

Put two squares, lined up one on top of the other. Make sure that the two squares you want to be on the top of the blanket next to each other are on the top and bottom of this stack.

Sew a 1/2 inch hem. And then do the same for the bottom two squares.

After you have these two "rows", stack them together and sew a 1/2 inch hem.

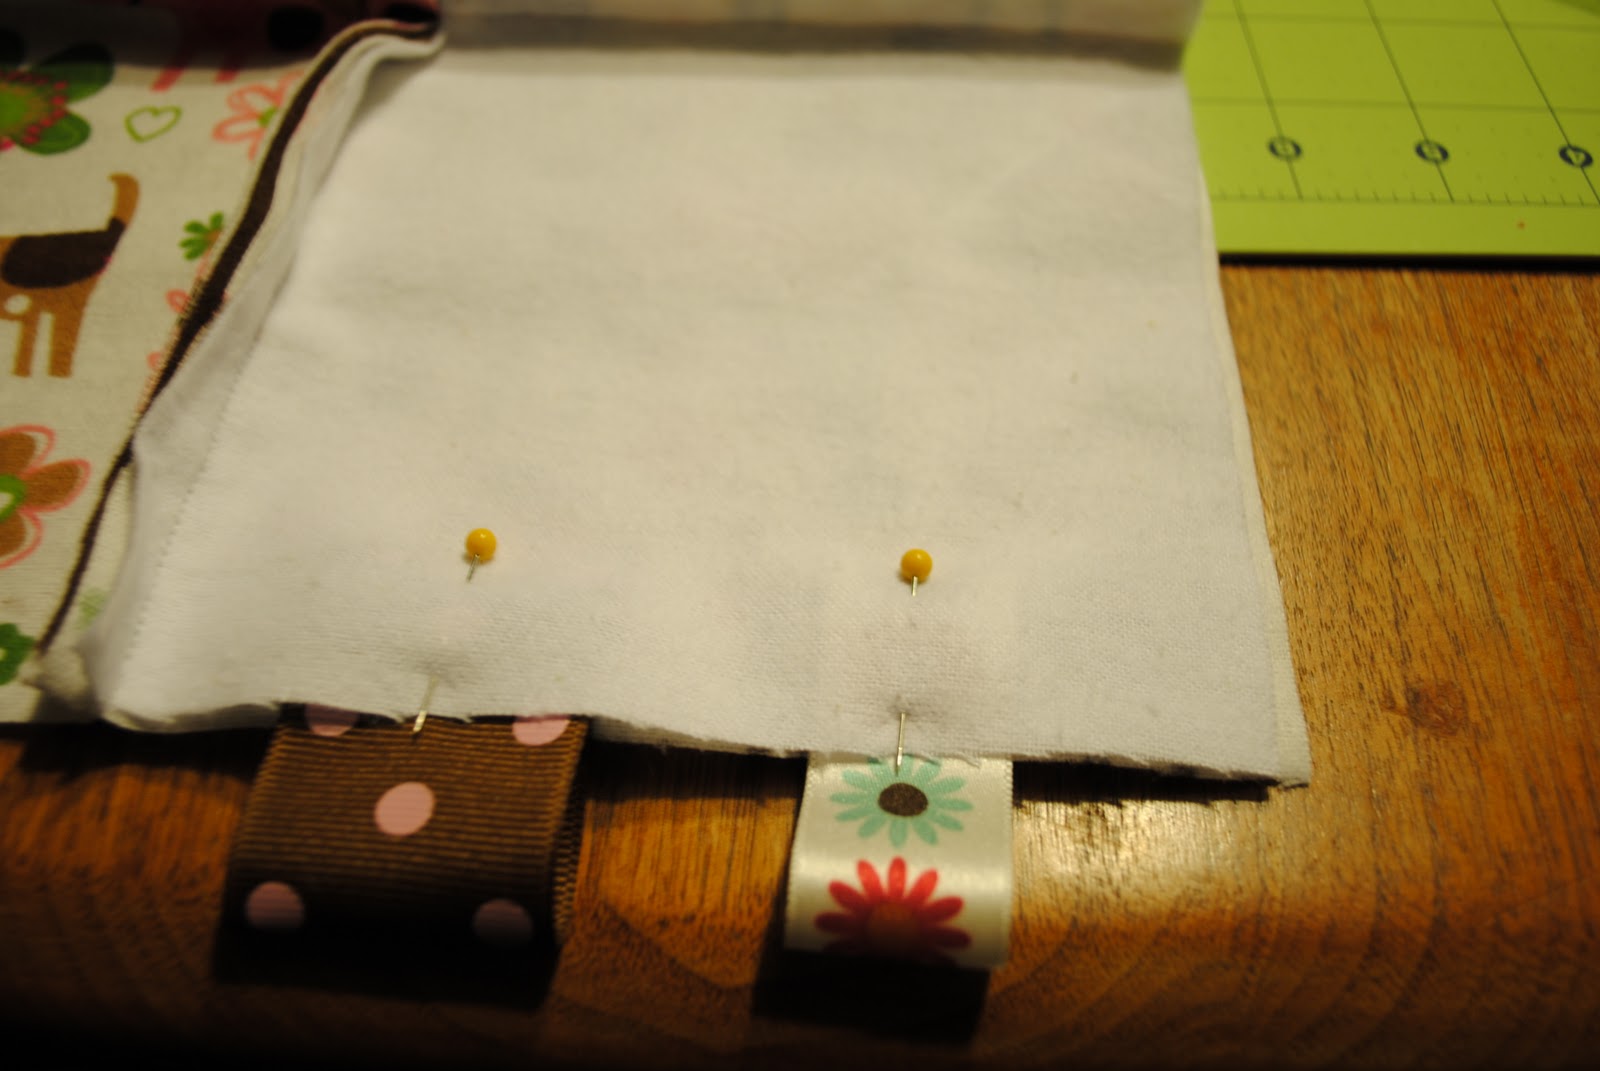
Do not sew the outside hem at this point. left up each square, fold a piece of ribbon in half, and pin it between the two pieces of fabric. Make sure that more than 1/2 in of the ribbon is inside the square, otherwise your hem will not hold it in place.


Continue to place the ribbons around the square. I used four ribbons on each side, but you can use as many as you want. Use different sizes, colors, and textures.

The front should look like this with all the hems facing up.

This is what the bottom should look like. None of your hems should be sticking up on this side.

Sew a 1/2 in hem.


Pull out your pins. As you take out each pin, give the ribbon a tug to make sure it is secure and isn't going anywhere. To make them more secure you can go around the square again to make two hems. You do not want to go less than 1/2 in though ! This will make ragging the blanket too difficult.

These are my rag quilt snips. I got mine at Jo Anne's. You can find them at any craft store. They make ragging your blanket easier, but you can use fabric scissors.
Take a coupon ! They are about 20$.

Take the snips are cut around the edge of the blanket and the inner hems.


When you get to ribbons snip each layer separately over and under the ribbon.


When it's done throw it in the washer and dryer and it will rag to look like this:


You are phenomenal! This is no easy project but you made it look effortless : ) I’m not sure I’m brave enough to try this but I’m bookmarking your blog : )
ReplyDeleteK
NewParent.com
I found you through Handmade Tuesdays over at Ladybug Blessings!!!This blankie is way too cute!!! I especially like all these little colorful ribbons!!! And the dog fabric is to die for!!! Great tutorial, I will definitely add this on my to make list on my blog http://sewhappiness.blogspot.com.
ReplyDeleteThank you so much for sharing this!!
Eleni
Wow...I've seen rag blankets and tag blankets but had never thought of combining them. What a fantastic tactile blanket for a baby to hold and explore!
ReplyDeleteI'm hosting two giveaways and would love it if you stopped by! You can win an organic onesie or a make your own book kit.
What a neat blanket. I've made a rag blanket, but I really like adding the tags.
ReplyDeleteI love these little blankies. Thank you so much for sharing how to make them:)
ReplyDeletexoxo Hanna
Oh my gosh, those are so cute! I'd love to have you share them at my For the Kids Friday Link Party (still open). Thanks for the tutorial!
ReplyDeletehttp://sunscholars.blogspot.com/2011/04/for-kids-friday-6.html